
David Anderson
Originally written in April 1999
We know what the geodesic surface templates look like from Part I. We know that they are naturally efficient. We found characteristic constants and solved the flattening problem for geodesic patches in Part II. We found the minimum values that bound the waste in these flattened surfaces. We spent some time pushing the academic envelope.
But that's enough theory - let's make some geodesic shells!
By merging and expanding the same basic geodesic projection program I have been carrying around for over a year, I made it produce the angles between the chords of the geodesic subfaces. Puting together these figures, the sweetest flattening template, a technical drawing program, scissors, and tape - kazaam! Geodesic shells, any frequency, scalable to any size.
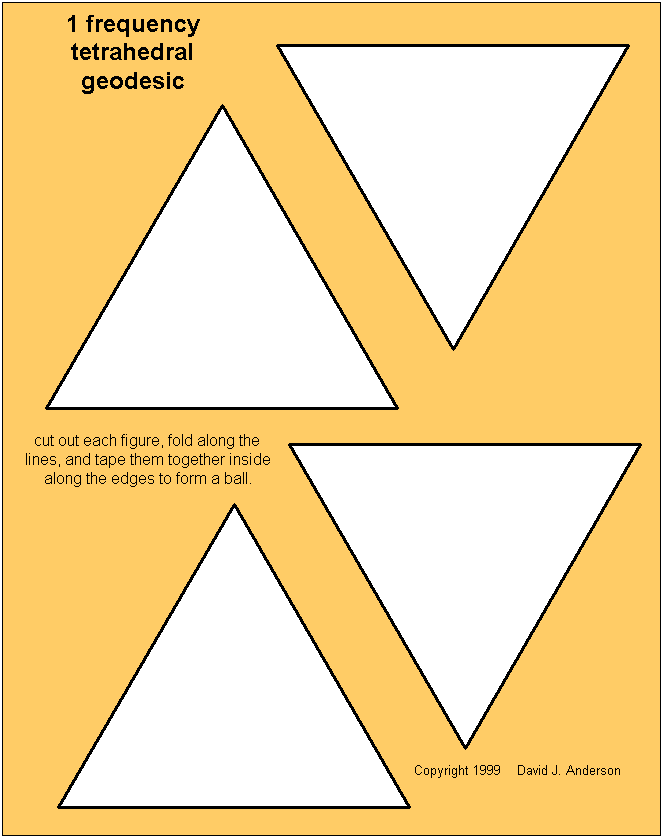
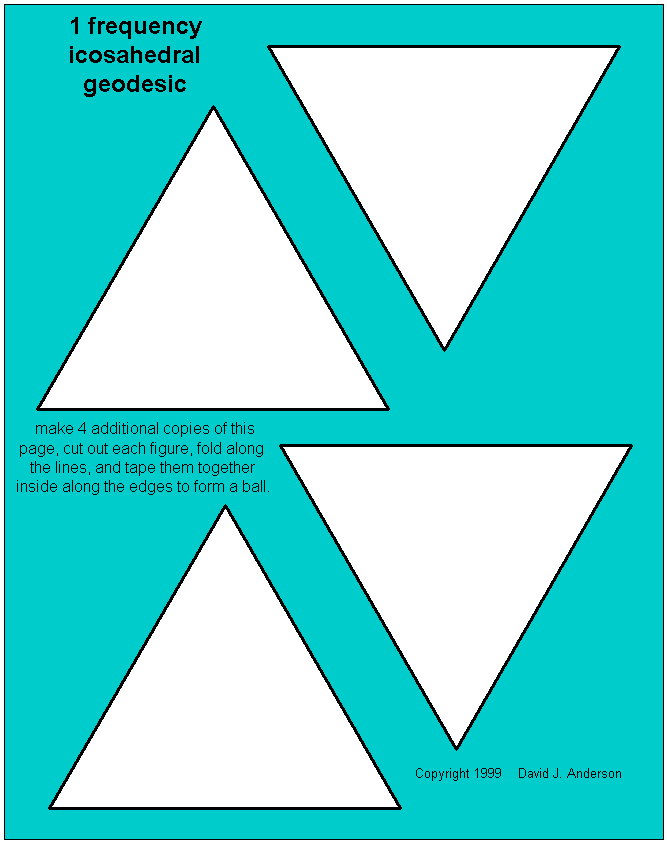
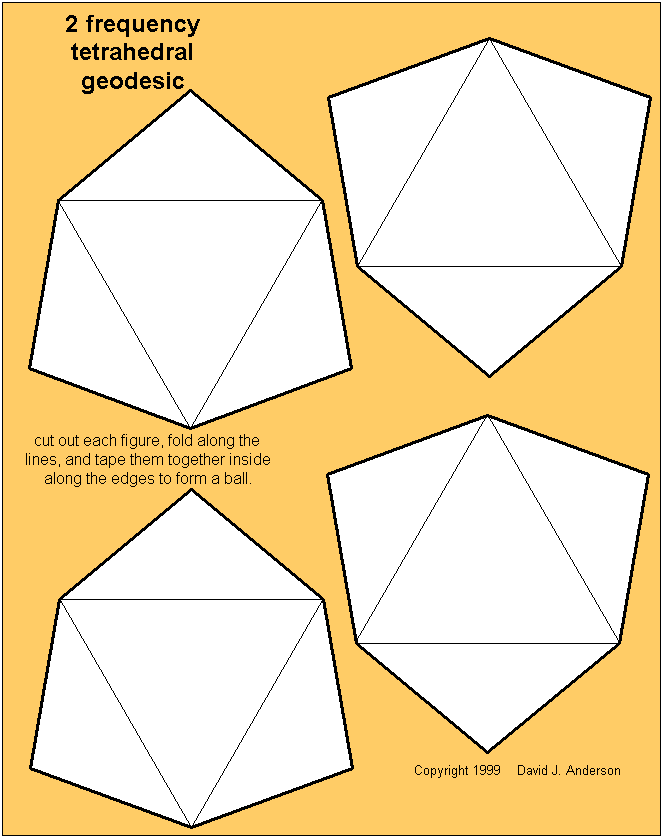
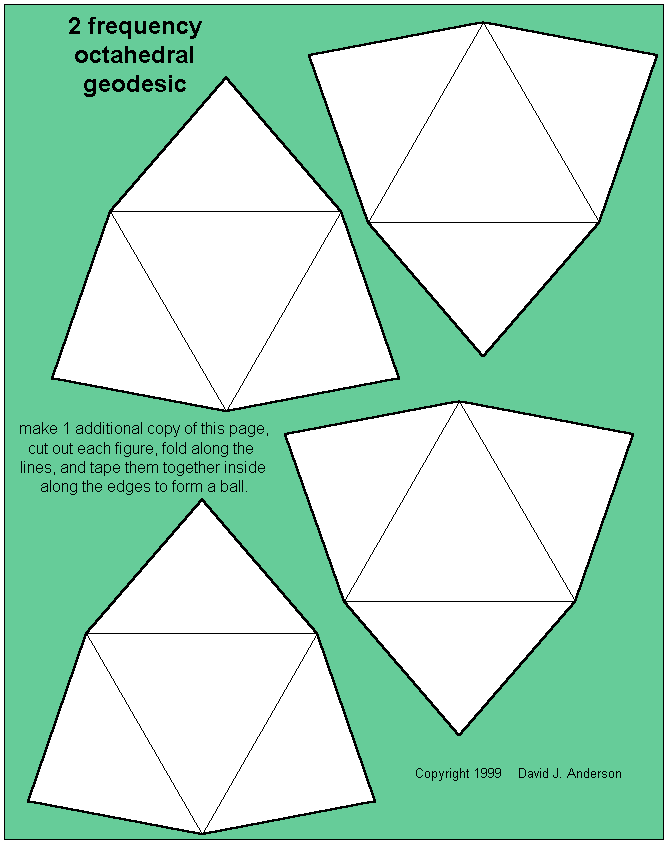
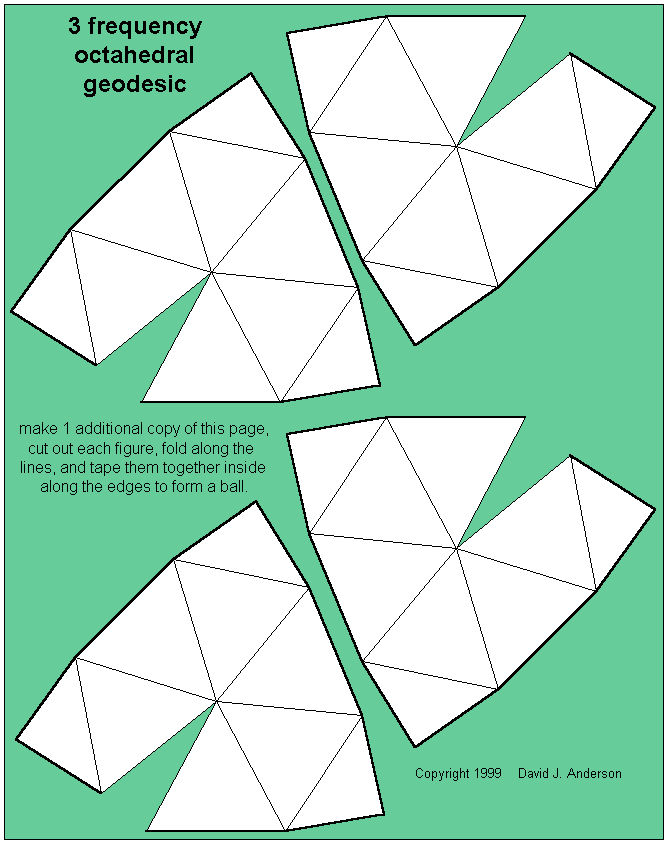
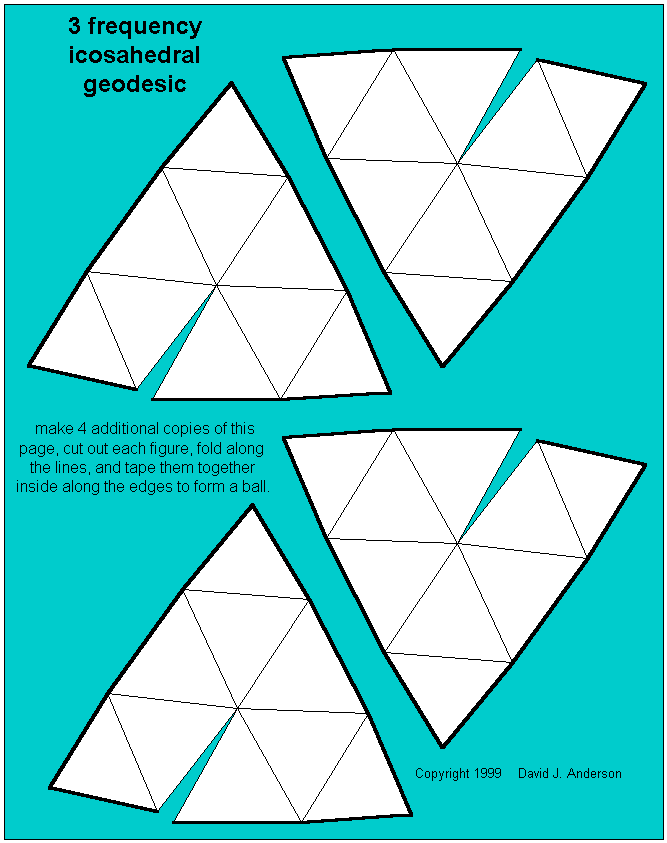
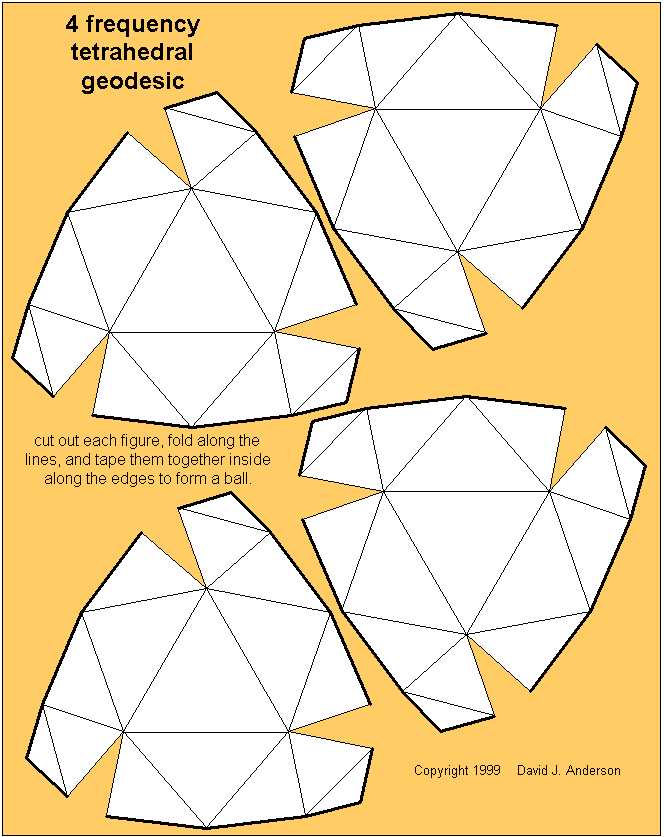
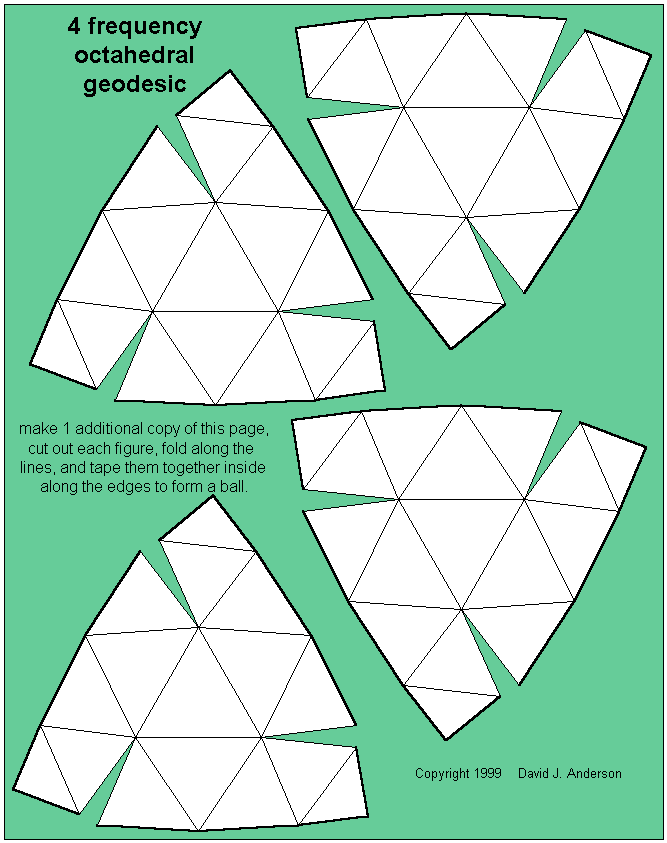
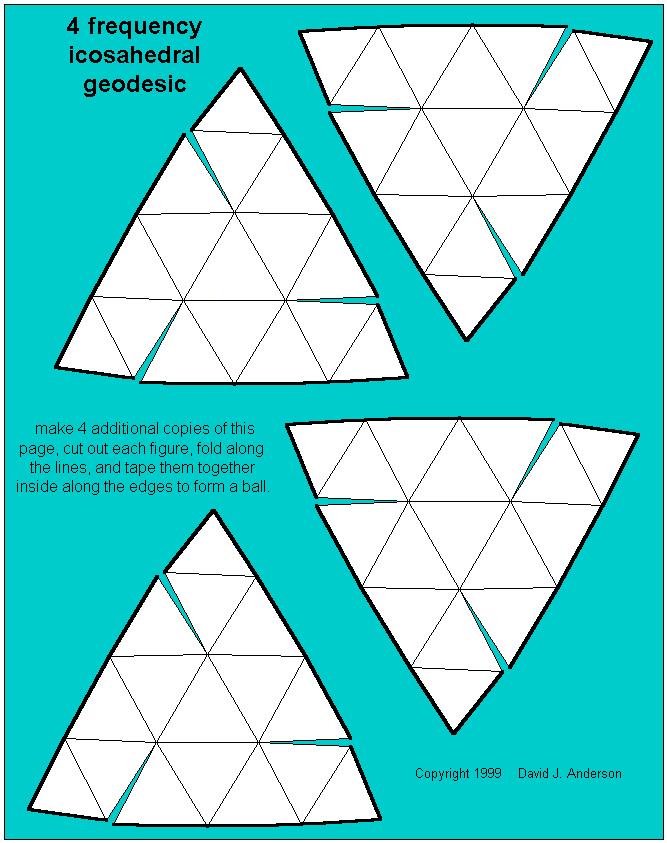
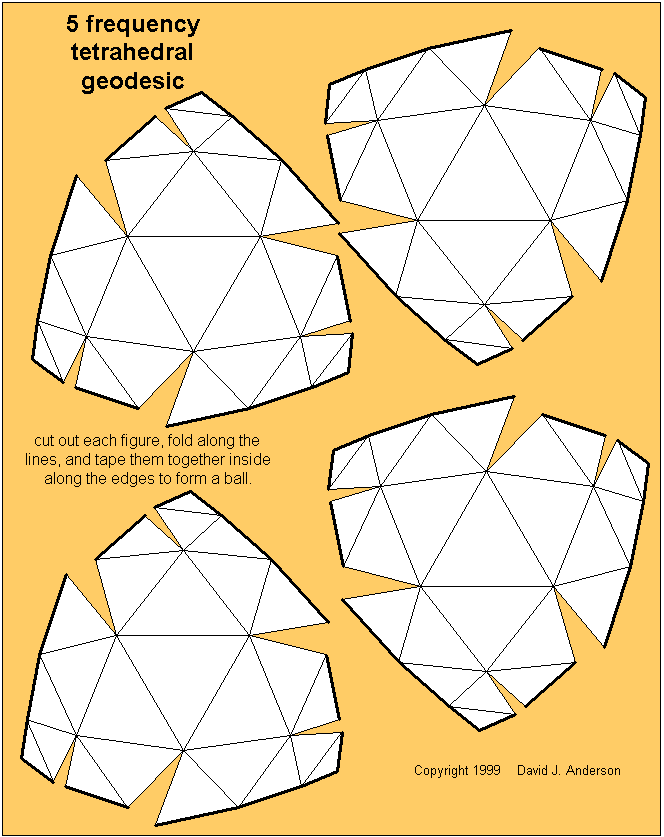
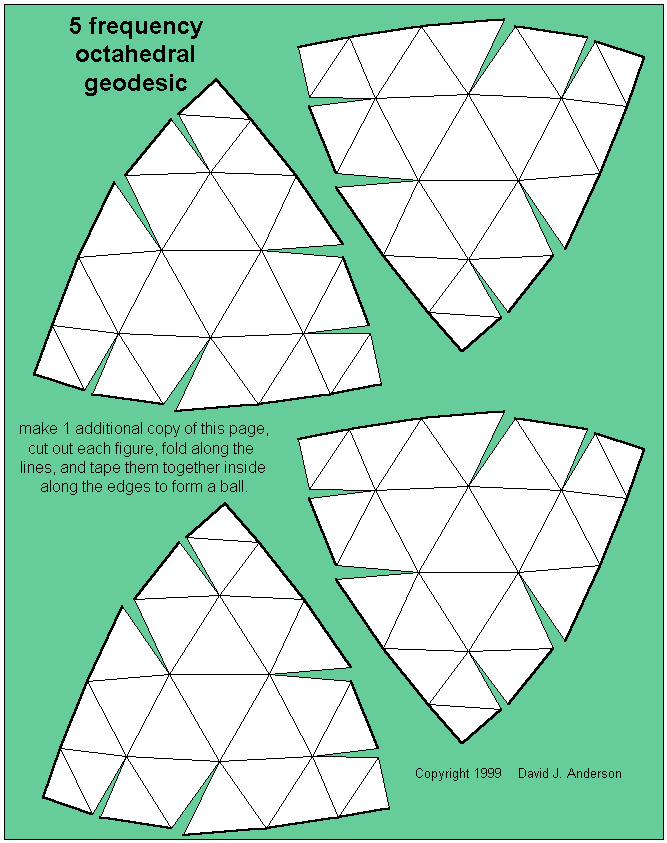
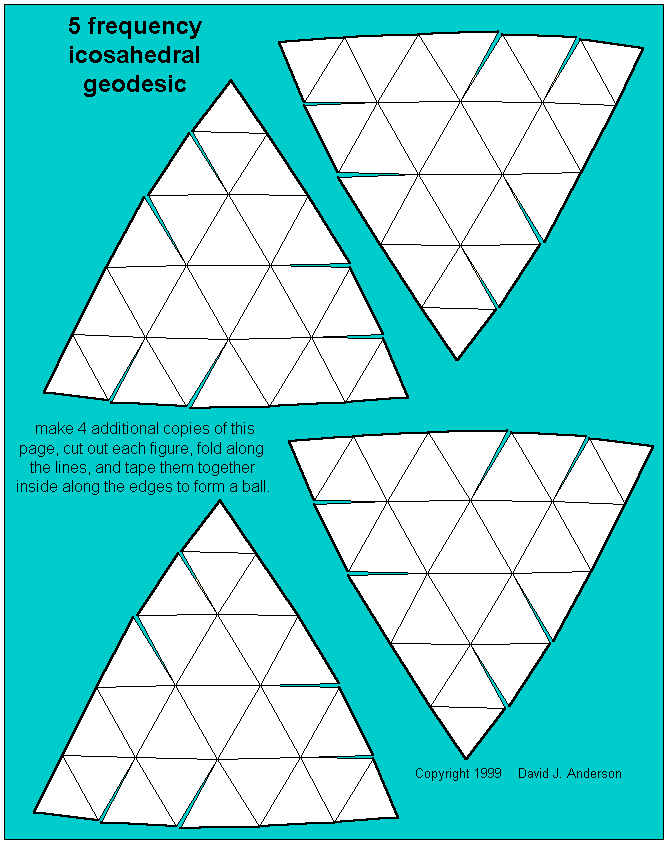
The following pages feature the flattened shells which you may print, cut out, fold along the lines, and tape together into a geodesic ball. The first five frequencies of the shell patches for each of the equilateral-triangularly-faced Platonic solids are given below. (Note the 1-frequency templates are just equilateral triangles, of course.) Higher frequency patterns or patterns for a particular size implementation might be had by contacting me about a special arrangement.
| Tetrahedron | Octahedron | Icosahedron | ||
| 1 frequency | Tetra1.gif | Octa1.gif | Icosa1.gif | |
| 2 frequency | Tetra2.gif | Octa2.gif | Icosa2.gif | |
| 3 frequency | Tetra3.gif | Octa3.gif | Icosa3.gif | |
| 4 frequency | Tetra4.gif | Octa4.gif | Icosa4.gif | |
| 5 frequency | Tetra5.gif | Octa5.gif | Icosa5.gif | |
To make a sphere, you will need to make some additional copies of the octahedral and icosahedral pages - you need a total of four tetrahedral patches, eight octahedral patches, and twenty icosahedral patches. You should cut them out carefully - above three-frequency the patterns contain notches. The material in the notch needs to be removed as well.
Once cut out, all the pieces need to be folded carefully along the lines. These folds should all be in the same direction, away from you. Next the notches should be taped closed - I always tape from underneath so it doesn't show. You now have assembled patches.
To finish, the patches need to be connected along their edges. Connect three tetrahedral patches at a corner, four octahedral patches at a corner, or five icosahedral patches at a corner - remember that the patches are just projections of the sides of the underlying Platonic solid so the basic geometry of the solid needs to be preserved for this all to work. Attaching most of the edges is easy; again I tape from underneath and take care to align the edges precisely. When you get to the last few patches, you are reaching into the ball to tape it closed, which can be a bit tricky. I end up using a letter opener slid into an open part of an edge to help.
While you're working (or once it is finished) you may dimple the geodesic accisentally. I have used the same letter opener to press out deep dimples from inside, but sometimes a little pressure on adjoining edges can pop a dimple back out. Printing the design on card stock instead of thinner paper will give a more rigid geodesic structure, less likely to dimple.
I've now constructed many of these shells, as well as many higher frequency geodesics.
The goal of producing these coverings was as a sheath to cover a geodesic skeleton. This sheath could be for a single-layered geodesic hull, or a multi-layered hull, like the warped octet truss. The skin can go on an inside or outside surface, but measuring well is an important prerequisite - otherwise the skin will be baggy or stretched too tight.
But even without a framework to be attached to, making simple models from patches made of folded paper is quick, easy, and leaves you with a very clean, mathematical artifact.